
Install
Install the plugin from the MuleSoftForge update site in Anypoint Studio. Use the arrows, the step numbers or the arrow keys to go through the steps. Click a screenshot to see it full size.
Step 1 of 15
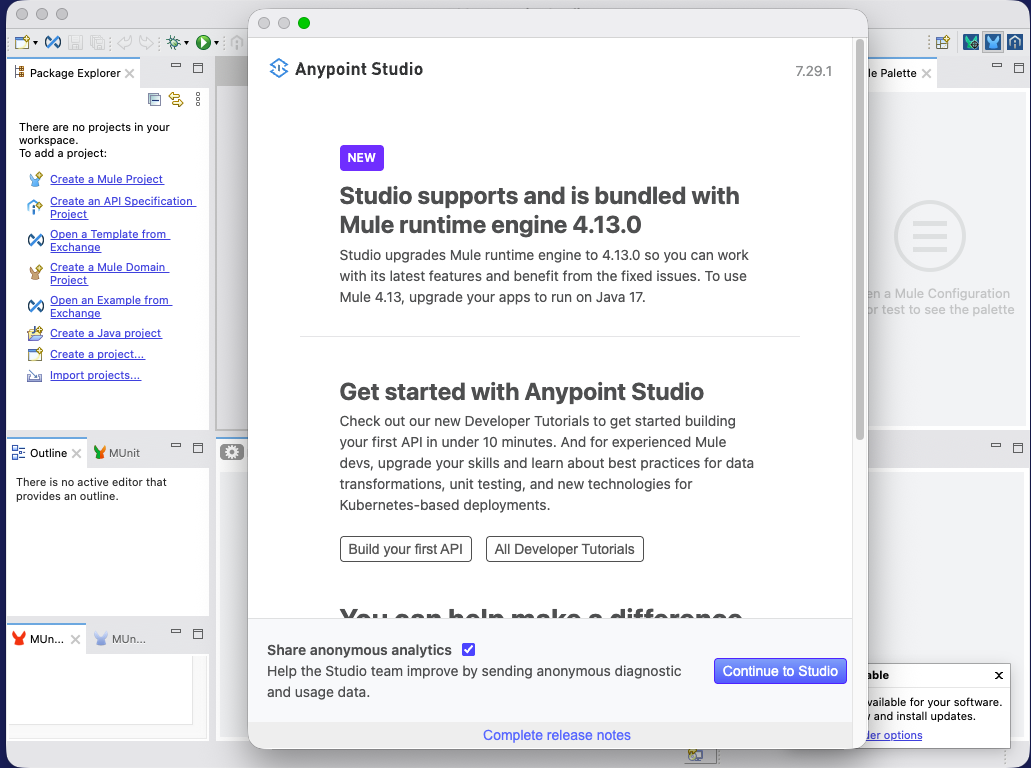
Start Anypoint Studio
If the welcome window opens, click Continue to Studio.
All 15 steps as a list
- Start Anypoint Studio. If the welcome window opens, click Continue to Studio.
- Open Install New Software. Choose Help > Install New Software…
- Add an update site. The Install dialog opens. Click Add… next to Work with.
- Enter the MuleSoftForge update site. For Name, type
MuleSoftForge Studio AI. For Location, pastehttps://docs.mulesoftforge.com/studio-ai/updates/. Click Add. - Select MuleSoftForge Studio AI. Tick MuleSoftForge. This also ticks MuleSoftForge Studio AI and shows its version. Click Next.
- Review and finish. Studio shows the item to install. Click Finish. The install continues in the status bar at the bottom of Studio.
- Do not trust all content. Studio asks if you trust unsigned content. Do not tick Always trust all content. If you tick it, Studio asks you to confirm. Click No, Prompt Me Instead.
- Trust this plugin only. Tick the Unsigned row. The list under it must show
com.mulesoftforge.studio.aiandcom.mulesoftforge.studio.ai.feature. Click Trust Selected. Beta releases are not signed yet, so Studio asks on each install and update. - Restart Studio. When Studio asks to restart, click Restart Now.
- Click the MuleSoftForge button. After the restart, the MuleSoftForge button is on the toolbar. Click it. You can also press Cmd/Ctrl+Alt+I.
- The view opens. The MuleSoftForge Studio AI view opens in the bottom panel. Its header shows the provider, Settings and the installed version. On the right, all Cost values show $0.00 · 0 tokens. This is correct: they start empty and fill in when you send messages.
- See the model prices. Click Show prices under Cost to see the price per 1M input and output tokens of each model. The prices are public list prices from OpenRouter. Your provider or endpoint can set different prices, so use them as a guide. Click Refresh to load them again.
- Move the view. Drag the view tab to a different place, for example next to the editor.
- Give it more space. The chat fills the space that you give it. A tall column next to the editor works well.
- Light or dark. The view follows the Studio theme. This is the dark theme.
The update site location for step 4:
text
https://docs.mulesoftforge.com/studio-ai/updates/Beta releases are not signed yet, so Studio asks you to trust them on each install and update. The source is on GitHub, so you can review it and build it yourself.
You can also open the view with Window > Show View > Other… > MuleSoftForge > MuleSoftForge Studio AI, or Cmd/Ctrl+Alt+I.
Next: set up a provider.
If the install fails with a certificate error on a company network, see Troubleshooting.